User-Defined Fields (UDFs): Creating & Managing Custom Fields
Fast-Weigh Web Portal
UDFs (or User-Defined Fields) are optional, custom fields that be added to your tickets, orders, and truck profiles.
Setting up UDFs

Click the User-Defined Fields button on the Web Portal Settings to begin setting up UDFs.
Ticket User-Defined Fields
These will show up on the Web Portal Ticket Entry, and can be turned on for your individual Ticketing Devices under Settings > Devices > UDFs.

Label each field to be used during ticketing.
Check the Used box to enable this UDF.
Set your Type as either Alpha (for letters and numbers) or Numeric (for numbers only).
Check Required to force the user to enter something in the field.
Check Validated and enter comma-separated (no spaces!) Values to create a drop-down menu with preset options.
Click Save when done.
Order User-Defined Fields
These will show up on the Order creation screen to allow for any extra info that needs to be attached to an Order.
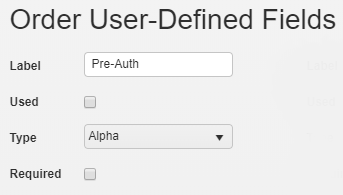
Label each field to be used during order setup
Check the Used box to enable this UDF.
Set your Type as either Alpha (for letters and numbers) or Numeric (for numbers only).
Check Required to force the user to enter something in the field.
Click Save when done.
Truck User-Defined Fields
These will show up on the Truck creation screen to allow for any extra info that needs to be attached to an Truck.

Label each field to be used during truck setup.
Check the Used box to enable this UDF.
Set your Type as either Alpha (for letters and numbers) or Numeric (for numbers only).
Check Required to force the user to enter something in the field.
Check Validated and enter comma-separated (no spaces!) Values to create a drop-down menu with preset options.
Click Save when done.
Related Articles
Creating & Managing Orders
Fast-Weigh Web Portal Ticketing cannot be done until there is an Order in the system to ticket for. Before an Order can be complete, it must have a Region, Description, Customer, and at least one Product added to it or be marked as Open. Establishing ...Adding & Managing Customers
Fast-Weigh Web Portal You can manage your entire customer list from the Customers section of the Web Portal. This includes full contact information, payment terms, pricing level, and credit status. If your organization will be using direct QuickBooks ...Creating & Managing Truck Types
Fast-Weigh Web Portal Truck Types are categories you can assign individual trucks to help organize them. You can add a Default Weight Capacity and/or Default Volume Capacity to automatically apply to any trucks assigned to that truck type. Creating ...Creating & Managing Dispatches
Fast-Weigh Web Portal To add the Dispatching module to your Fast-Weigh subscription, contact us at 865-219-2980 or support@tacinsight.com Setting up Haulers, Trucks, and Orders for Dispatching Before a truck can be used for a Request, you will need ...Adding & Managing Products
Fast-Weigh Web Portal Product Categories Product categories are useful if your company has a large number of products that need to be organized by type. Categories can be used to separate reports to show broader sales comparisons. Note: Product ...